Wednesday, April 9, 2014

Hada Labo Super Moisturising Cleansing Oil

I've bee through my fair share of cleansing oils - MAC, Shu Uemura, DHC, Fancl, Sana. Hada Labo's oil intrigued me because of its claim to contain olive oil and no mineral oil. Since the price point was well below the brands mentioned above except Sana, I though it couldn't hurt.

 photo IMG_6263_zps0654fc4d.jpg

Appearance

The oil is a clear liquid, it only appears yellow because of the bottle's colour

Texture

It has a normal viscosity unlike some other cleansing oils I've tried such as DHC which are extra thick in consistency. I like the normal consistency more because it feels easier to spread out and emulsify the makeup on my face.

Efficacy

In terms of effectiveness, I felt that the oil removed my foundation and sunscreen quite easily, without drying out my skin.

Pricing
The cost is one of the cheaper olive oil based, mineral oil-free cleansing oils I have tried. I purchased this on vacation in Malaysia for approximately RM 42-ish, which translates to about USD 14.

Availability
Online is your best bet if you are purchasing from North America. I've shipped with www.adambeauty.com more times than I can remember over the past 6 years, and never have problems. Navigation is usually the issue as the site sorts by parent beauty company which isn't intuitive to those not in those regions. Hada Labo is under the Mentholatum Company brand. You may also find it in some Asian beauty supply stores if they stock the Hada Labo brand.

Sunday, April 6, 2014

Clarins Radiance Plus Golden Booster

Ever since I got back from my vacation, I've been looking forward to beach weather! Now I'm not a beach person usually, and I only just went on my first trip to a resort on this vacation but that, and age (ahem) is what did it for me!

So it was exciting to see the Radiance Plus Golden Booster out from Clarins recently. My skin doesn't tan well, not to mention I'm extremely paranoid about applying sunscreen to prevent damage so I barely tanned at all on my vacation and felt a bit self conscious about appearing relatively pale on the beach. I need all the help I can get to get that healthy glow before summer.

 photo IMG_3832_zps9f1e7cdf.jpg


How it works

The product is a self tanner that should be mixed with your regular moisturizer first, before applying. I found this to be a great concept because most tanners are straight creams or lotions which equates to yet another layer to put on after the serums, creams, sunscreen... You get the picture. Also many people like myself already have a preferred daily moisturizer  so not having to switch away from that is a huge plus for me.

 photo f0c539ba-2187-459c-84e5-1435a1942a3e_zpscbc177e8.jpg


Product

It's a golden clear slightly viscous liquid that you mix into your daily moisturizer. Surprisingly simple :)

 photo IMG_3996_zps566b86bf.jpg


Packaging

Bottle with dropper opening but the drops appear to dispense via gravity - that's okay if all you needed is one drop but if you need more, the downside is there is no way to control the drops. There's no rubber bulb and the bottle isn't squeezable. I had difficulty getting the 3 drops out, ended up shaking the bottle to make the product come out. What makes this frustrating then is you already have your face cream product in one hand and in trying to shake more drops out of the bottle, you might just splash some elsewhere accidentally.

 photo IMG_3994_zpsc0a374d6.jpg

Results

The tan does work in just a few hours! I applied it in the morning and by afternoon could see the effect. However don't let this scare you off, even at 3 drops the tan was quite subtle. It was so subtle that even though I wanted to take before/after photos it was tough to get the difference to show up on my phone. I can see how if I continued it as a regimen that this would gradually intensify and be more photographable.

I tested this on the inside of my arm to ensure 3 drops was the right amount - Clarins said you may want to start with 2 if unsure and on the paler side. Something to keep in mind before you go full out on the product.


Pros and cons

The most wonderful part about this product is how it effortlessly integrates into your daily routine, through simply mixing it with any moisturizer you currently use.

Another good thing are how subtle the tan is so you can build it up gradually, most tanners have a bad reputation for turning orange too quickly but not this one! For someone like me that's important as I don't want to show up at work the next day looking like an Oompa Loompa as my colleagues will definitely notice any dramatic change.


Where to buy

The Golden Booster is available from Sephora and Clarins.ca for CAD$30.


If you have tried self tanners before, what were the results like? Do share!


Wednesday, August 29, 2012

Daiso Face Net

While I was in Asia, I had the chance to stop by Daiso and picked up quite a few random beauty tools. One of my most used purchases is the face net. Daiso carries quite a few options in terms of size, with a larger size having the capacity to produce more foam. I picked a combo pack of one medium and one small - shown below is the medium size from the package:

Photobucket


Here's how it works in four steps:

  1. Dampen the face net, then dispense some face wash on the net on the palm of your hand.
  2. Work the product into the net in a scrubbing motion.
  3. Once there is lots of lather or enough for your liking, squeeze the lather into your palm by pulling the net through your index and middle fingers.
  4. Apply and have fun :)
Photobucket

Overall, I felt the net really helped create foam more easily from a smaller amount of product. I used it with the Marcelle Essentials Foaming Gel cleanser, and ended up cutting the product I used by almost half. It differs depending on your product though, I couldn't cut as much product with the Green Beaver Grapefruit cleanser for example, probably because it's not meant to foam much to begin with.

Also I've heard that using this foaming method is meant to reduce the need for you to rub your face while cleansing thus reducing the odds of wrinkles. For me it doesn't help though, because my face tends to get dry and flaky so I exfoliate more often even when I'm using the net. I would say I use it more for the luxurious feeling of the foam :)

Sunday, August 19, 2012

August with Annabelle

Hey guys! It's been a while, I have lots to catch up on in the blogosphere, and to update on as well. Firstly, I finished grad school, and spent the last 2 months visiting my family in Asia, as well as traveling to some other areas (Hong Kong, Beijing).

Surprisingly, I didn't shop as much as I would have in the past. Trying to be more disciplined about my collection and not buy something that I will only use once. I went through my traincase the other day, and there are just too many things I have that fall into that category.

But anyway, I think these days I'm definitely more discerning about what I like and don't like, which is good for you readers since it means more thorough reviews than ever! :)


Today I wanted to share with you 2 products from the Annabelle Summer collection, the Biggy Bronzer and Hawaiian Hues eyeshadow palette. Both retail for $12.95.

The Biggy Bronzer is just as its name says, quite big ;)

Photobucket

I am loving the wave pattern on the surface. This is not just a flat pattern but the powder surface itself is actually curved, a nice touch of luxe-ness in my opinion.

Photobucket


The powder is very finely milled and gives an amazing glow to my cheekbones. It's not an "out there" type of glow but a subtle sheen.

The colours are a gradient of pinkish brown shades. They are subtle enough that they should flatter any skin undertone. Considering my skin has a fairly pronounced yellow undertone it worked well.

Photobucket

Photobucket


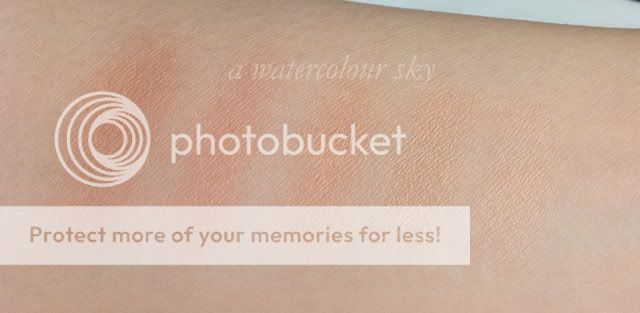
Considering how subtle the shades are, I think it would serve as a highlighter for those with darker skintones. On me, it adds some colour if I use a normal brush with the darker stripes, but in this picture I had used a fan duo fibre brush just to get a highlighting effect.

Overall, I would recommend the biggy Bronzer as a solid addition to anyone if they lack a Bronzer or one in the more pinkish end of the spectrum.


The Hawaiian Hues palette has a nice collection of summer shades, ranging from copper and neutrals to summer brights.

Photobucket


I am not too keen on the packaging for the palette, as it was more of a generic plastic common to most drugstore products. Each eyeshadow strip was also quite thin, and if you like using your own eyeshadow brushes instead of the provided applicators, then it may be tricky to swirl your brush in the pan to pick up colour.

Photobucket


Swatches in the same order as the palette, from left to right:

Photobucket

Photobucket

Photobucket

Some colours are done better than others. The colours I found with good pigment and texture are the copper, brown, silver-grey. The rest, especially the yellow shade on the right were more powdery, coarser textured, and only had mediocre colour payoff.


Overall, I felt that the Hawaiian Hues palette was somewhat lacking in quality colours. If you are just starting out in makeup and want to play around with a wide variety of colours, this could be worth a look, but you may outgrow it fast as you become more adventurous with bright colours (or realize that you just prefer neutrals).

Monday, April 30, 2012

Butter London Spring 2012: Bossy Boots, Slapper

I always thought Butter London was a strange name for nail polish. The image of yellow, fresh churned butter + a location seems miles away from colour for your nails.

But then I received two polishes from Nail Polish Canada that really turned the lightbulb on. Meet Bossy Boots and Slapper, from the 2012 Spring collection:

Photobucket

Bossy Boots is a pistachio green with a creme finish that seems to be everywhere this year. Another way to describe the colour is a matcha green.


Photobucket


Applying the colour is literally like butter. The formula seems to level out on its own even on one of my nails which had some ridges that couldn't be buffed away.

Photobucket

Photobucket

Photobucket


Slapper is one of those beautiful but hard to photograph accurately colours. In person, it is a bright green with teal tones, but in photos, whether I used my iphone or camera, the colour keeps showing up as being more blue-turquoise. Just keep in mind that it is a greener colour than what appears in the picture.

Photobucket

Photobucket

The closest I could get to capturing the green tone were the next two pictures:

Photobucket

Photobucket

Both colours were applied with two coats, and then topped with Seche Vite topcoat. Overall, I really liked the Butter London formulation! There are 3 other colours in the collection which you can see on Nail Polish Canada's page, and also do check out MacNunu's review of the collection!
Blog Widget by LinkWithin