Someone asked for a tutorial on my eyemakeup in a previous post some time ago. I don't have a video camera though so I could only do a picture tutorial...but my looks are pretty simple anyway so i hope pictures will suffice :)
I did only one eye this time because I was in a rush to take pics before someone came home lol.
The look:

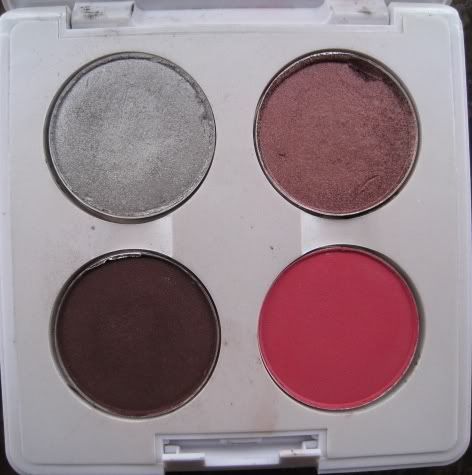
The colours I'm using:
From left to right, clockwise: Electra, Star Violet, Passionate, and Sketch (All MAC).
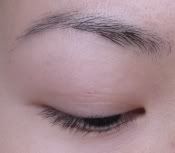
1. Bare eye:
Prime with a primer such as Urban Decay Primer Potion, or a concealer that will help neutralize any discolouration on lids and also help eyeshadow stick to the eyelid. Not shown because I think this was pretty straightforward?
2. Using a eyeshadow brush / finger, apply some MAC Electra to inner corner of eyelid.
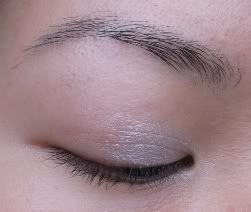
Don't bring it up higher than your crease. If you're not sure where your crease is, keep it low. You can always bring it up higher later if you want the colour to be more dramatic.
To me my "crease" is where the fold appears when I open my eyes. Depends on your eye shape and type though.
3. Apply Star Violet next to Electra, up to 2/3 of the lid.
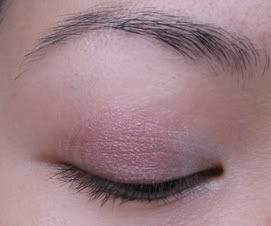
4. Apply Sketch to the outer 'V' of the lid.
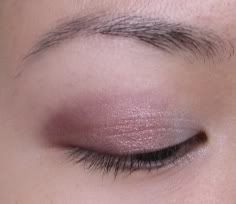
Don't apply Sketch too high if you want a natural look. I find that with my eye type, if I make the V too exaggerated (too high) it looks very obvious. So I prefer it lower these days. Also if I were to do this with a dark color, such as a dark purple or black, an exaggerated V always makes me look like I got punched in the eye :S
I usually apply it so that when my eyes are open, Sketch shows up right at the fold, as the below picture shows:
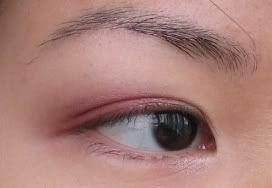
5. Apply Passionate to the area between Sketch and Star Violet
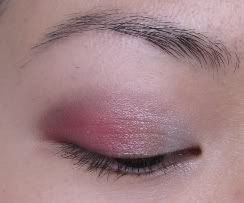
6. Blend so the colours are not blocks of colour, but fade into each other.
You can blend either with a clean finger, or a clean eyeshadow brush. Also don't forget to blend at the crease where the eyeshadow stops, so that it doesn't look like a solid mass of colour on your lids. For crease blending, I like to use a floppy blending brush like Sephora's crease brush, because its soft and doesn't tug on the skin.
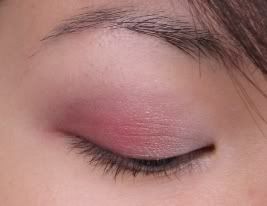
Blending colours into each other sometimes erases some of the colour intensity as well, but just pick up some more shadow with your finger/brush, reapply and reblend as necessary. I find this is the most time consuming process in any look.
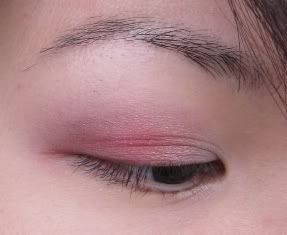
Then do the rest of your makeup per usual....curl lashes, mascara, etc :)
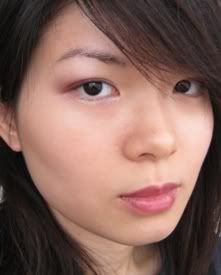
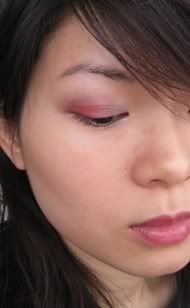
Nothing too fancy, as most of my FOTDs are its pretty subtle I think. Not that I have anything against bright colors but I think I'm going through a more toned down phase these days so I keep even the brighter colours low, that way most of it shows only when I look down/blink.
Anyway, hope that helps someone a little at least ! Constructive feedback on improving this will be welcome too :)

6 comments:
love the eyes!
the two tones r perfect together.
Do you mind that i link you on my blog?
thanks :) nope i don't mind at all cuz i'm gonna link you too :)
Oooh I love this look! Totally jealous at how easy you make it seem!
nice tutorial very subtle. Your lucky you dont need to do anything to your brows :(
I like how your looks are toned down! It's easier to do and you can actually wear it outside without feeling over done. It's fun to play around with crazy colors sometimes, but you can't really wear them during the day.. great tutorial! :)
mulzanza: thanks! :D good to hear since i've never done a tutorial before...
elizabeth: thank you :) in a way it is convenient how i don't have to fill them in. however its annoying how unruly they can be if i don't keep them groomed regularly....
mae: yes exactly! i do love playing around with OTT looks but i usually end up doing toned down stuff these days.
Post a Comment